How to Create Lightroom Presets
How to Create Lightroom Presets
Intro
If you spend any time at all on Instagram, I am sure you have seen or at least heard of presets and preset packs. Influencers and photographers create and sell them to allow anyone to achieve their “signature look”. Many people who sell them also make the completely false promise that their presets are a “one click” fix to make photos look perfect every time. Today, I will be diving into what presets are, why they can be useful, and also give you a guide on how to create them yourself.
What are Lightroom presets?
So, first thing’s first; what are Lightroom presets? When influencers and photographers refer to presets, they are referring to presets that are specifically used in the photo editing application, Adobe Lightroom. In Lightroom, there are hundreds of possible settings that can be adjusted when editing a photo. Presets automatically adjust specified settings in one single click to make the editing process much quicker and consistent.
Why are presets useful?
So then, you may begin to understand why presets are so useful. When photographers edit photos, there are many settings that they will keep the same between every photo. Instead of having to manually adjust or toggle those settings for every photo, Lightroom presets allow those changes to be made with a single click (or automatically applied to photos when imported into the application). Photographers spend most of their working hours editing; and using presets efficiently allows photographers to cut down the amount of time they spend editing significantly. After years of perfecting my eye, adjusting my presets, and refining my work flow, I can edit over 200 wedding photos an hour. Without presets, this speed would not be possible.
How to create your own Lightroom presets
If you are a photographer or someone who is looking to get into photography, then you are likely interested in how to create Lightroom presets for yourself. So, I am going to teach you how to do just that.
Before I begin, I want to clarify a couple things. First, there is no such thing as a preset that will give you perfect results in one click for every single photo. Presets are something that help save time and create consistency in your final edits, they do not edit your photos fully for you. It may work in a single click from time to time but it will not work for every single photo. Believe me, I wish editing photos to perfection did only take one click; but it is simply not the case.
In my own work, I have presets that do many different things; from applying my basic import settings to color adjustments, vignette, and noise reduction. These presets are meant to save time and create a consistent final product.
So without further adieu, let’s create the most used preset in your tool belt; your import preset. An import preset should (in my opinion) consist of only very general modifications that get your photos to a place where they can diverge into whatever style you wish. I use my personal import preset for every genre of photography, from weddings to landscapes, and simply apply other presets along the way with some minor hand editing to get them to their final destination. Your import preset will likely change over time so it is ok to update it as your style changes but today, you can at least create something to start off.
When creating your import preset, you want to ask yourself, “what settings do I adjust on every photo I edit?”. The answer will differ for every individual but to give you an idea, I am going to use my own import preset as an example. The first thing you want to do is select a photo (any photo will do). Go to develop (hotkey: D) that photo and make sure to start with a blank canvas by clicking the “reset” button (bottom right) to make sure no previous edits are applied to your photo. Now, let’s get into the details…
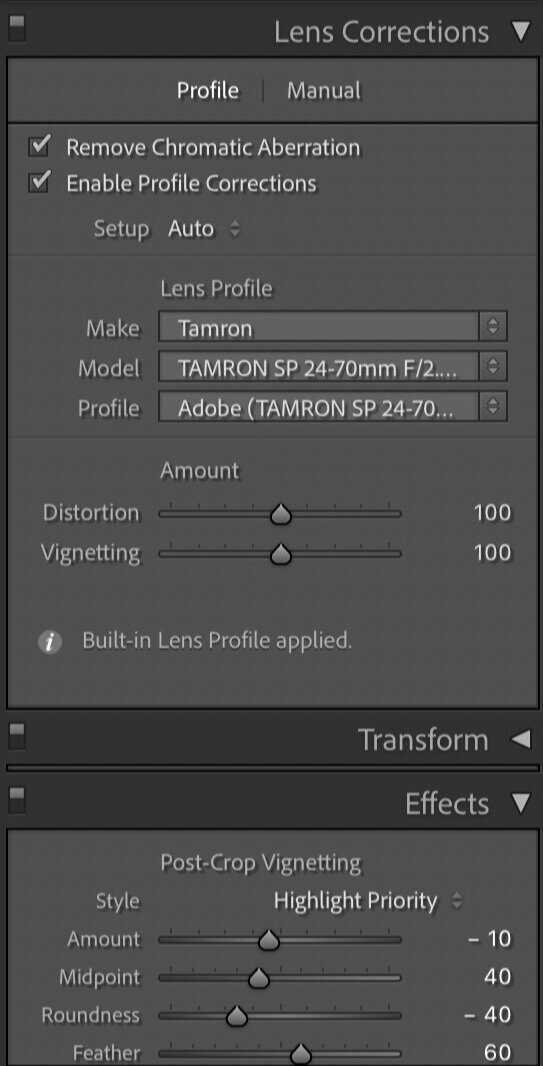
In my import preset, starting from the top, I always set the “Profile” to “Adobe Color” because I think it offers a great starting point. The color profile is not too punchy in color or contrast and is not too flat. I personally do not add any contrast to my photos because I prefer to do so by adjusting the other “Tone” sliders (highlights/shadows/whites/blacks). I always like having a bit more information to work with in my edits so I have my highlights set to -25, shadows at +20, and blacks at -5 (I do not touch the whites unless I decide to later). Now as far as the “Presence” goes with my photos, I have the “Texture” set to 5, and “Vibrance” set to 25 (I prefer vibrance over saturation and use the HSL tab to adjust saturation instead). Next, (skipping over a few other settings that I leave untouched) under the “Detail” drop-down, I have my “Masking” set to 85 under “Sharpening” because I do not want the whole image to be sharpened, just the edges of the main subjects (to see what is being sharpened, hold down “option” on a Mac and “alt” on a PC as you adjust the masking slider). Under the “Lens Corrections” drop-down, I select “Remove Chromatic Aberration” and “Enable Profile Corrections”. Lastly, under the “Effects” drop-down, I set my “Post Cropping Vignette” “Amount” to -10, “Midpoint” to 40, “Roundness” to -40, Feather to 60, and “Highlights” to 50. Again, for the vignette, feel free to hold “option” on a Mac or “alt” on a PC to see what the vignette controls are doing as you adjust the slider. That is it for my basic import preset! You can see all these adjustments in the screenshots below for reference.


So now that you have created your first preset, how do you save it? To save any preset, go to the “Develop” tab at the very top of your screen and click on “New Preset”. After you click that, a screen pops up and you can name the preset (in this case naming it “general import” or something to that effect will do) and then you will need to select all the settings you want to save that will be applied with the preset. For my personal import preset I gave the example of, I would select “Treatment and Profile”, “Highlights”, “Shadows”, “Black Clipping”, “Texture”, “Sharpening”, “Lens Corrections” (which will select all subsets of that), “Post Crop Vignetting”, and “Process Version” because those are the only settings I made changes to.
How to apply your presets
Now that you have created your preset(s), you need to know how to apply them. As mentioned previously, you can apply them by clicking them individually on the left side of the user interface under the “Presets” tab when developing individual photos (see picture below).

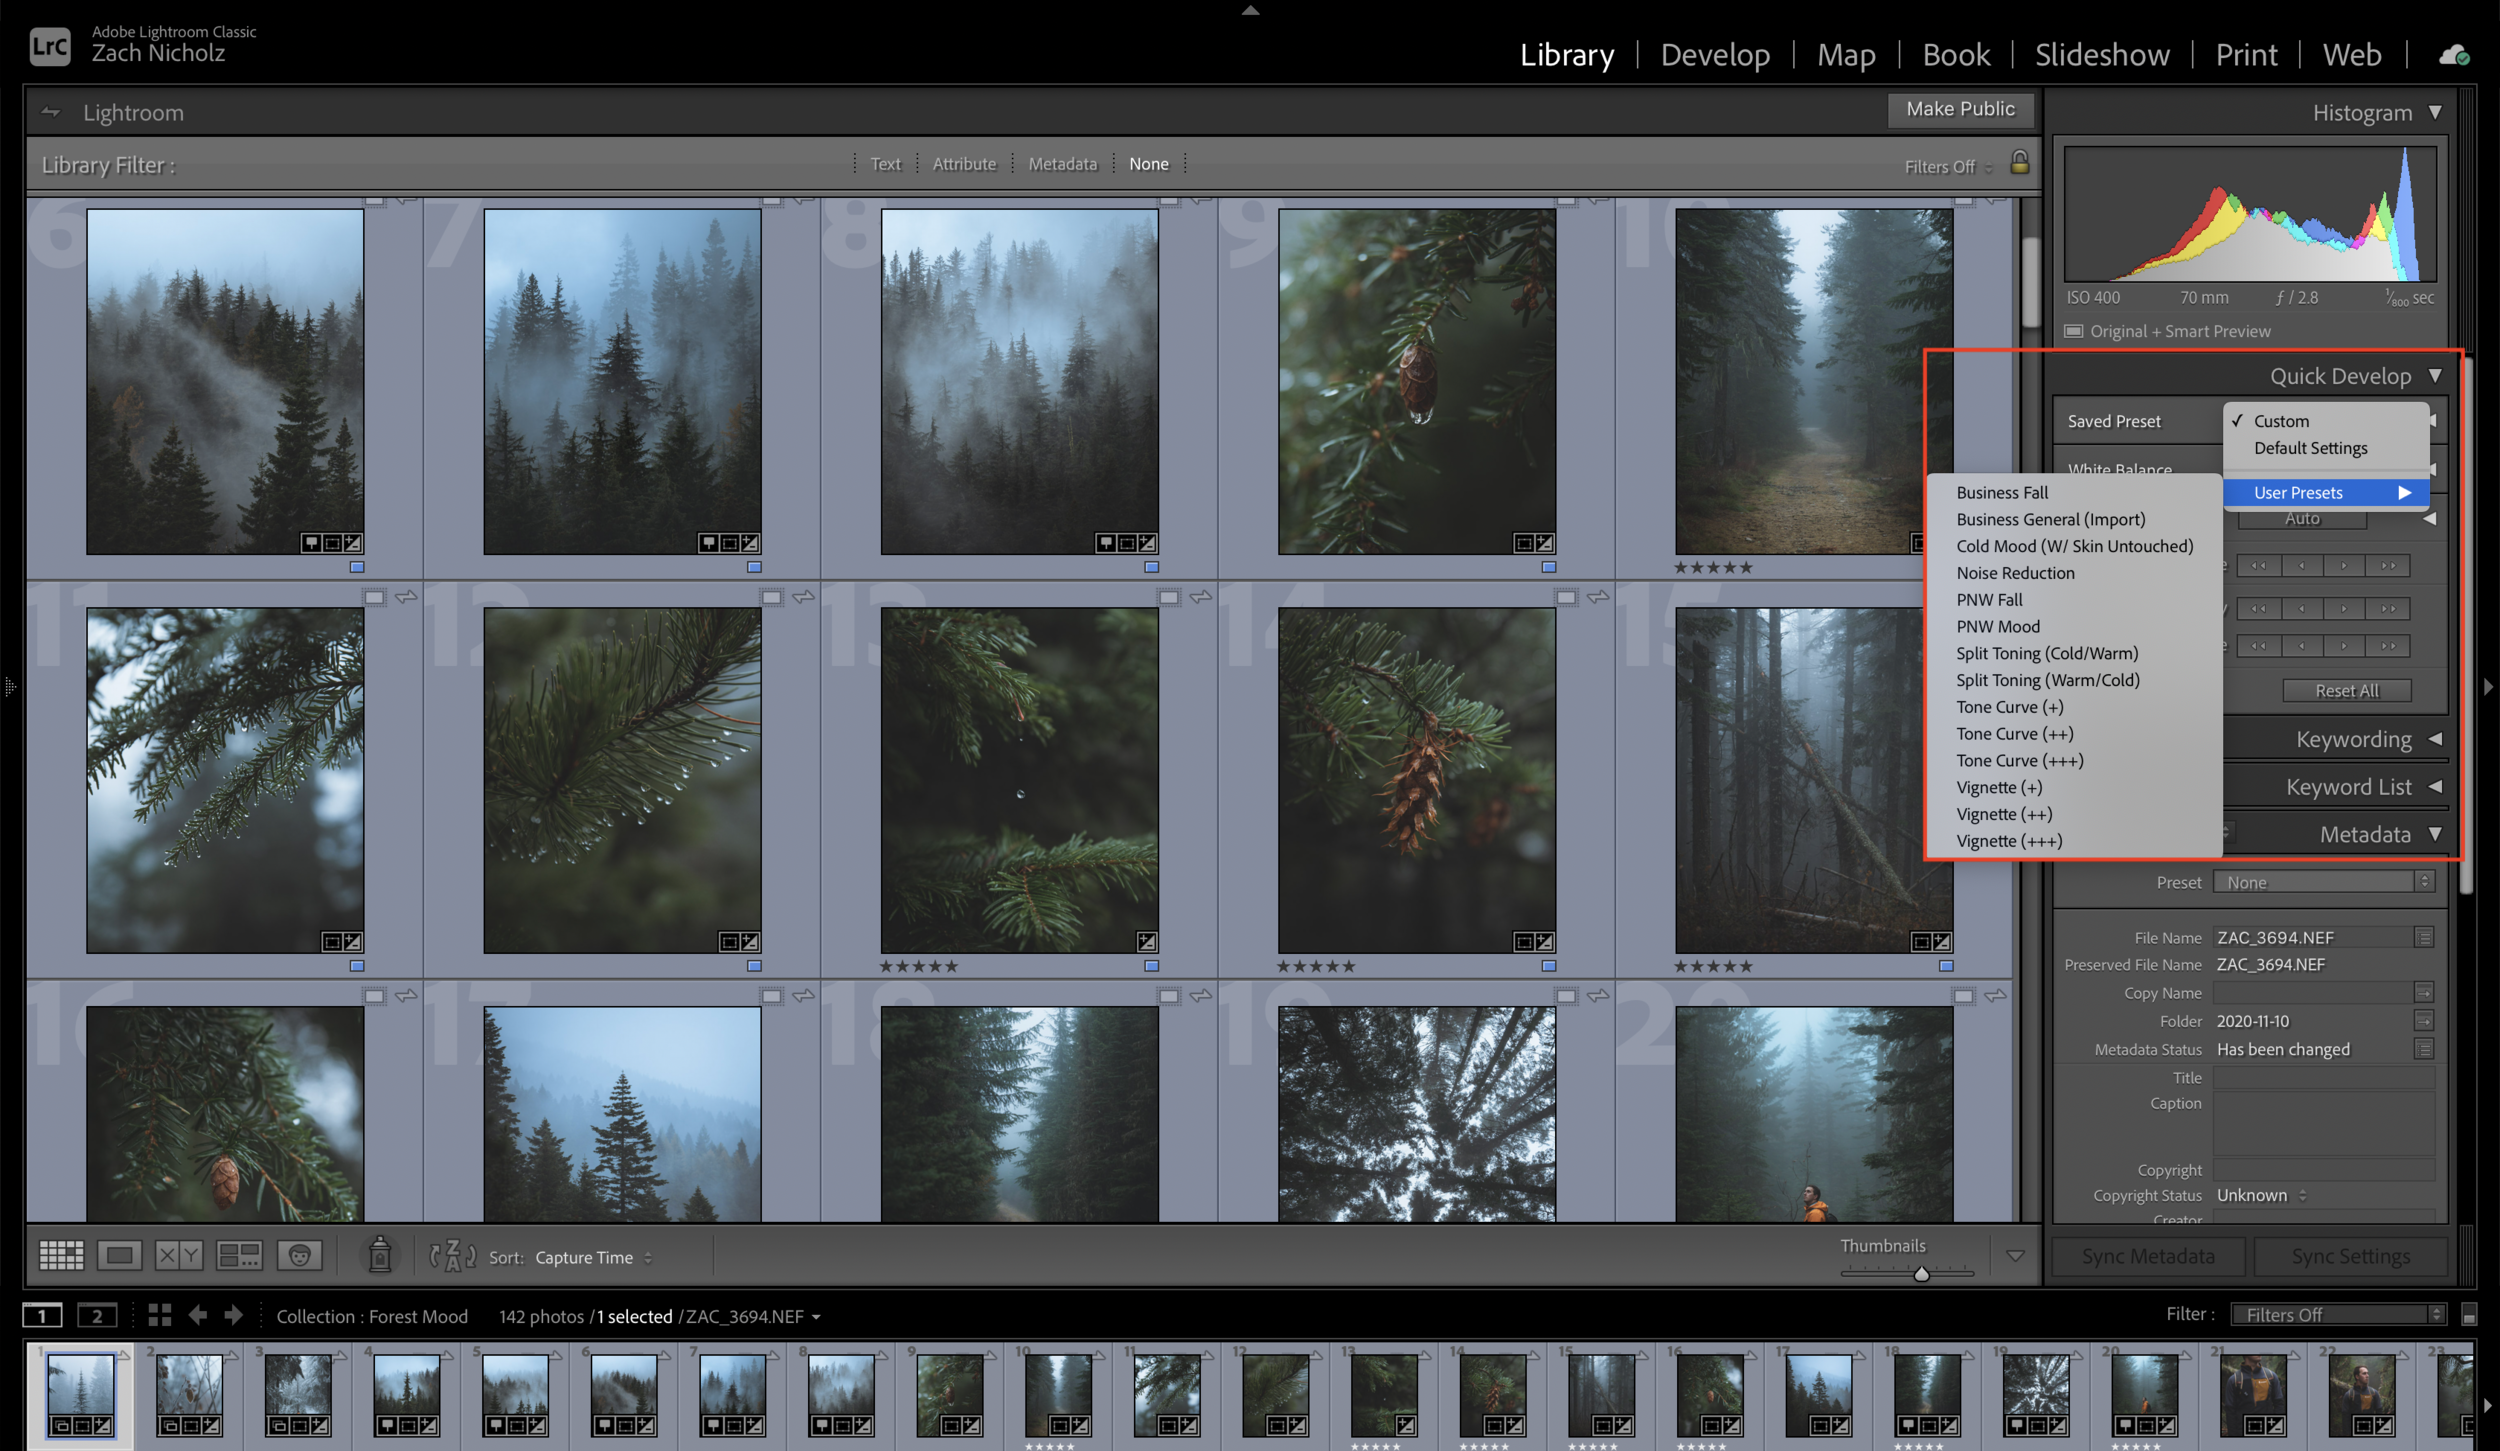
You can apply presets to multiple photos in your library by selecting the photos that you want to apply the preset to and then going to the “Quick Develop” tab on the right of the user interface and clicking “Saved Preset” > “User Presets” > and then the preset of your choice. This preset will then be applied to all of the selected photos (see below).
Lastly, you can choose to apply one “Import Preset” to all of your photos when they are imported from your device into the Lightroom App. To do this, go to develop a photo and right click the desired preset under your “User Presets” and then click “apply on import”. If you did this correctly, the preset will then have a “+” to the right of it, signifying that it is your import preset.
Another way to choose a preset to be applied on import can be done when importing photos. Under the import tab, click “Apply During Import” on the right side of the interface and then click the drop down menu titled “Develop Settings” then click “User Presets” and then the preset of your choice.

Conclusion
I hope this introductory guide proved useful to you. When used correctly, presets can cut your editing time down significantly and can give your photos a cohesive look that will go great on your Instagram feed or in your portfolio. I did want to note that there are many ways to edit photos and the way I do it is what I have found to work best for me. The example I gave is based on personal preference alone and is by no means the only or best way to edit. Presets are personal so make them work for you and have fun with it!
If you would like to read another great article on Lightroom presets and more, go check out the article, “30+ Top Lightroom Presets To Make Your Images Pop” on Pixpa!
As always, let me know if you have any questions by commenting below or my DM-ing me through my Instagram (@zachnicholz). More detailed information will be coming soon for those of you looking to dive deeper into preset creation. Thanks for reading along!
-Zach
How to Create Lightroom Presets
Written by: Zach Nichols
November 13, 2020
© Zach Nichols Photography